
 By
By 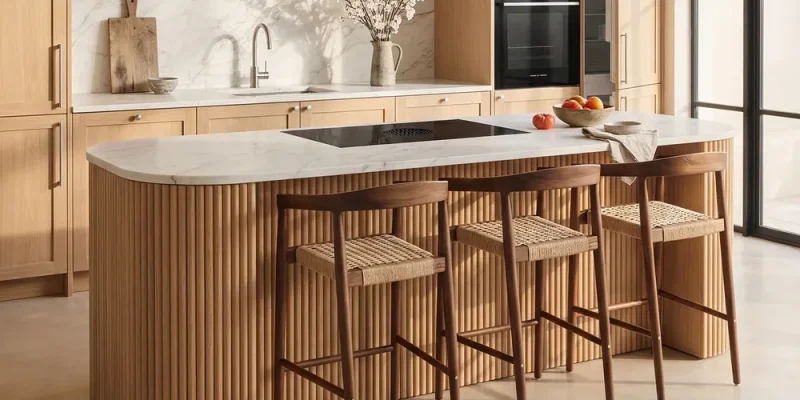
A well-planned kitchen island remodel can change the way your kitchen works every day. It can give you more prep space, better storage, easier traffic flow, and a natural gathering spot for family and guests. If your current kitchen feels cramped, outdated, or poorly organized, the right island design may be one of the most practical upgrades you can make.
Introduction
Before choosing countertops or cabinet colors, start with one simple question: how do you actually use your kitchen?
Some homeowners need more room for cooking. Others want seating for kids, guests, or casual meals. Many California homes also feature open floor plans, which means the island often becomes both a functional workspace and a visual centerpiece.
A successful remodel is not just about adding a large feature in the middle of the room. It is about improving movement, comfort, storage, lighting, and long-term usability.
✓ Think about daily routines
✓ Identify storage problems
✓ Consider seating needs
✓ Plan for cooking and entertaining
✓ Leave enough walkway clearance
⚠ Warning: Do not choose island size based only on photos. A beautiful island that blocks traffic will quickly become frustrating.
Step 1: Measure Your Kitchen and Study the Layout
Start with accurate measurements. This step may feel basic, but it prevents expensive mistakes later.
Measure the length and width of the kitchen, the location of doors, appliance openings, windows, and existing plumbing or electrical lines. You also need to account for refrigerator doors, dishwasher clearance, oven doors, and cabinet drawers.
A comfortable kitchen island usually needs open walkways around all sides. Many homeowners underestimate this space, especially in older California homes where kitchens may not have been designed for modern open layouts.
Checklist:
✓ Measure wall-to-wall dimensions
✓ Mark appliance swing areas
✓ Note plumbing and electrical locations
✓ Check traffic paths to dining and living areas
✓ Confirm where seating can fit comfortably
Tip: Use painter’s tape on the floor to outline the island before construction. Walk around it for a few days and see if the size feels natural.
Step 2: Decide What the Island Needs to Do
Once you know the available space, decide what role the island should play.
Will it be mainly for food prep? Do you want casual seating? Should it include storage, a sink, outlets, or a microwave drawer? The clearer your priorities are, the easier it becomes to make smart design choices.
Common island functions include:
- Food preparation
A wide countertop gives you more space for chopping, mixing, baking, and serving. - Casual dining
Counter seating works well for breakfast, snacks, homework, and informal meals. - Storage
Deep drawers, pull-out trays, and cabinet organizers can reduce clutter. - Entertaining
An island creates a natural place for guests to gather without interrupting the cooking zone. - Appliance support
Some islands include a prep sink, beverage fridge, cooktop, or microwave drawer.
Many homeowners researching island renovation options discover that the best design is usually the one that solves their most frequent daily frustrations.
⚠ Warning: Adding too many features to one island can make it crowded. Prioritize what matters most.
Step 3: Choose Materials That Fit California Living
Materials should look beautiful, but they also need to perform well over time.
Quartz is a popular countertop option because it is durable, low maintenance, and available in many styles. Natural stone offers unique veining and a high-end appearance. Butcher block adds warmth, though it requires more care.
Cabinet finishes should also match your lifestyle. A busy family kitchen may benefit from easy-to-clean surfaces, soft-close drawers, and durable hardware. If your home has strong natural light, test cabinet samples at different times of day because colors can shift depending on lighting.
Material planning checklist:
✓ Choose countertops based on durability and maintenance
✓ Select cabinet finishes that complement the rest of the kitchen
✓ Use hardware that feels comfortable every day
✓ Consider water-resistant flooring near cooking and cleaning zones
✓ Match lighting style to both function and design
Tip: If your island will include seating, choose a countertop edge that feels comfortable and safe for everyday use.
Step 4: Plan Lighting, Outlets, and Workflow
Lighting can make or break an island design. Pendant lights are popular because they add style and help define the island, but they should not be the only light source.
Layered lighting works best. Use overhead lighting for the whole room, pendant lighting over the island, and task lighting where food preparation happens.
Electrical planning is also important. Modern kitchens often need outlets for small appliances, charging devices, and occasional work-from-home use. California homeowners should also consider energy-efficient fixtures and appliances where possible.
A strong workflow connects the sink, refrigerator, cooktop, and prep areas without unnecessary steps. The island should support this movement, not interrupt it.
⚠ Warning: Do not place seating directly where someone needs to stand for cooking, cleaning, or appliance access.
Step 5: Think About Budget, Timeline, and Professional Help
A kitchen island project can range from a simple cabinet-and-countertop addition to a larger remodel involving plumbing, electrical work, flooring, and layout changes.
Budget depends on size, materials, structural changes, and finish quality. A larger island with plumbing, outlets, custom cabinetry, and premium countertops will cost more than a basic storage island.
Timeline also matters. If your remodel affects the main kitchen work zone, plan for temporary meal preparation. Even a well-managed project can disrupt daily routines.
For larger california remodels, homeowners often benefit from planning the island as part of a complete kitchen strategy rather than treating it as a standalone feature. This helps ensure cabinetry, flooring, lighting, appliances, and circulation all work together.
Budget checklist:
✓ Cabinetry
✓ Countertops
✓ Labor
✓ Electrical work
✓ Plumbing, if needed
✓ Flooring adjustments
✓ Lighting fixtures
✓ Permits, if applicable
✓ Contingency fund
Tip: Set aside extra budget for unexpected discoveries, especially in older homes.
Final Thoughts
A kitchen island should make your home easier to live in. It should support cooking, gathering, storage, cleaning, and everyday routines without making the room feel crowded.
The best kitchen island remodel starts with careful planning. Measure first, define the island’s purpose, choose durable materials, plan lighting and workflow, and build a realistic budget before construction begins.
When every decision supports the way you actually live, the finished island becomes more than a design feature. It becomes the practical, welcoming center of the kitchen.

Comments